


Astrophotography presents unique challenges to a photographer: manually focusing in the dark, manual exposure, and in Alaska, coping with the cold while waiting for the aurora to come out. As much as thoughts of post-processing our images nestled in a warm house with coffee the next day sustain us through the night, one challenge remains — dealing with the digital noise inherent in low light photography. Luminance and chroma (color) noise can turn a beautiful nighttime landscape into a splotchy, grainy mess, especially if we want to create a large print for displaying. While digital camera sensors are getting better all the time with cleaner, ever higher, high ISO captures, some software noise reduction is still needed.
In this blog, I will compare three methods to remove noise: using Adobe Lightroom Classic; Median Stacking in Photoshop; and Topaz DeNoise AI. This is not intended to be an exhaustive study on noise reduction. Readers may disagree with my settings or may know of better methodology. I welcome your comments and advice. Nevertheless, there is one overriding principle that I had to adhere to: image sharpening and noise reduction are flip sides of the same coin. Detail is lost if too much noise is removed resulting in an unrealistic, plastic-textured appearance. Conversely, increasing sharpness and detail enhances the underlying noise. As with all things post-processing related, moderation is the key and the goal is to balance the two.
Setup
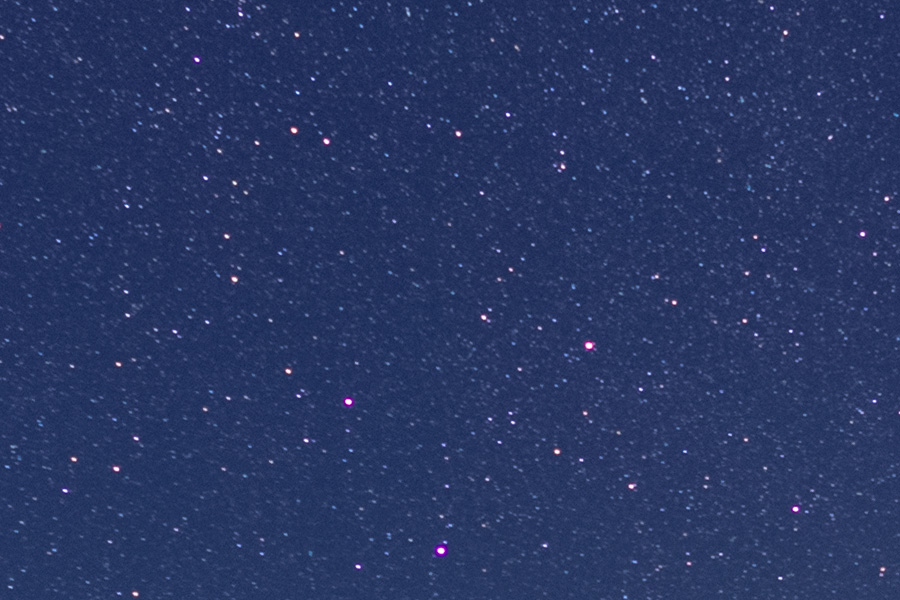
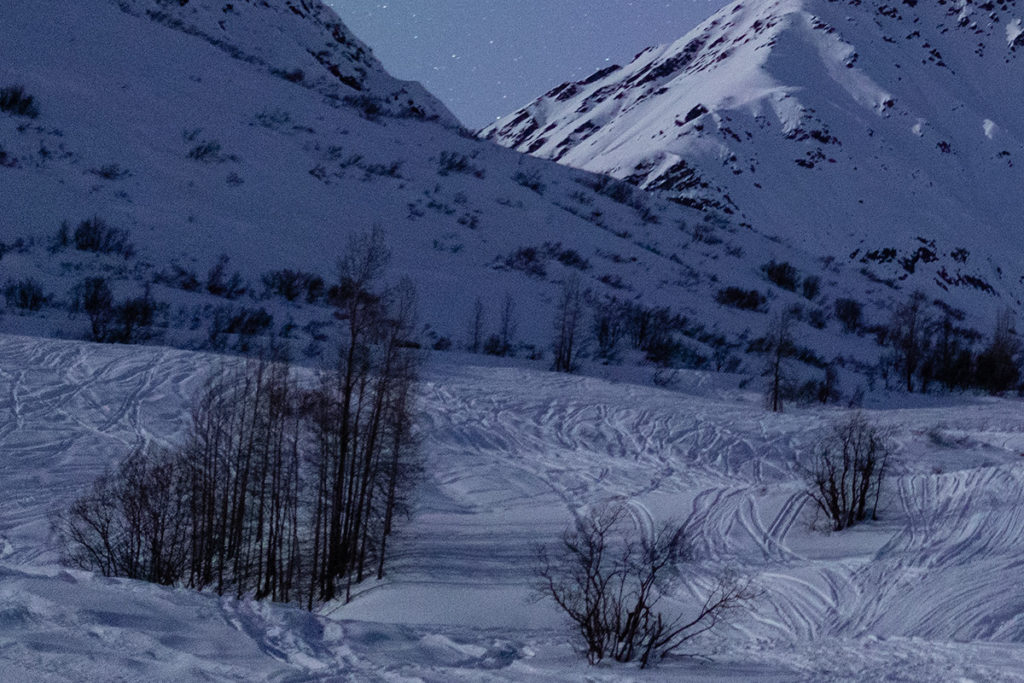
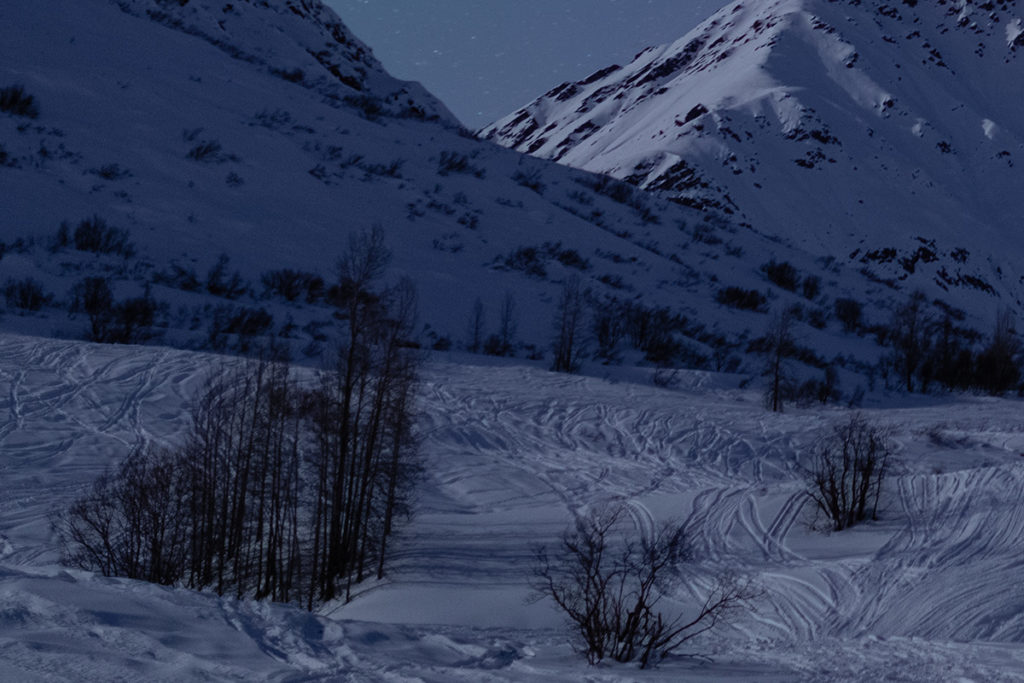
The lead photo of a faint aurora overlooking Archangel Valley in Hatcher Pass was taken on a Canon EOS 5D Mark IV camera. Even though the Mark IV is nearly 4 years old, it remains Canon’s best rated sensor according to DxO Mark (dxomark.com). Its low-light ISO performance metric is better than the highly regarded Nikon D850, but underperforms Sony’s A7RIII and A7RIV models. Nevertheless it has a good reputation for night photography because of its low noise.

I used a Sigma 35 mm f/1.4 DG HSM Art series lens for composition. This sharp, fast lens is a favorite of mine for night photography. Exposure was 8 sec. at f/1.8 and ISO 3200. A quarter moon was illuminating the landscape which helped me to reach a good compromise between shutter speed, aperture, and ISO. The histogram reflects the overall exposure, that is, with most pixel values residing in the shadows and midtones. To help reduce noise I often shoot brighter than I want the final image to be. For example, in the final image I lowered the exposure 0.4 EV to render it to a more realistic night appearance. A HoodLoupe was used to manually focus on the camera’s LCD. The mirror was locked up and a cabled shutter release was used to minimize any vibrations. White balance was set on the camera to 4000 K, which I think gives the night sky color a natural look.
Images were imported into Lightroom. A medium contrast tonal curve was applied with a moderate amount of clarity and vibrance. No sharpening or other changes were done.
Lightroom Noise Reduction

Lightroom’s default value of 25 for Color noise reduction did a good job of reducing chroma noise so I did not adjust this slider. The Luminance slider was increased to 37 to reduce the dark, luminance noise. No enhancements in Detail or Contrast were done. The sharpening parameters are as shown with the radius appropriate for a high frequency (lots of contrast edges) image. Masking was increased to 53 to ensure that sharpening was at the boundaries between stars and sky and not the sky itself.
Median Stacking Noise Reduction
Median noise reduction is a mathematical technique that relies on the fact that digital sensor noise is randomly generated. By taking several images and applying the median stack mode in Photoshop noise is removed. For this exercise, I took ten images in rapid succession. No sharpening or noise reduction was done in Lightroom before exporting the photos into Photoshop as stacked layers in one file. For reference, the last file in the series of ten was used for the noise reduction done separately by Lightroom and Topaz DeNoise AI.
Because over the course of taking ten images the star positions in the sky move, the sky and ground must be aligned and noise reduced separately. In the final image, the sky is composited with the ground using a mask and brush. The entire sequence is outlined below. I list the sequence not to provide detailed step-by-step instructions, but rather to show how involved the technique is. The final image took about one hour of post-processing to complete.
- Take several (the more the better) photos in quick succession
- Process in Lightroom or other RAW converter. Do not apply any noise reduction or sharpening.
- Load files into stack (layers) in Photoshop
- Select all layers and collect into group called Sky
- Duplicate Sky group and rename Ground
- Add a white layer mask to the first image in the Sky group. Using a black brush with 100% opacity and 100% flow mask out the ground.
- Duplicate that layer mask to all of the other remaining layers in the Sky group
- Select all of the Sky layers and Auto-Align
- Delete layer masks from all of the Sky layers
- Select all of the Sky layers and convert to a Smart Object (stack)
- Select the Sky smart object and apply the Median Stack Mode under Smart Objects
- Turn off the layer visibility of the Sky group
- Select all of the Ground layers and convert to a Smart Object (stack)
- Select the Ground smart object and apply the Median Stack Mode under Smart Objects
- Turn visibility back on for the Sky group
- Select the Sky group and add a white layer mask
- Using a black brush paint in the ground
- Reduce your brush size along the interface between the ground and sky for brush in fine details
- Alternate with a white brush to produce a seamless composite between the sky and ground
- Option-click (Alt-click for PCs) the mask to see areas needing to be masked out with the black brush
- Crop the final image to remove the transparent edges created during the auto-align in step 8
Topaz DeNoise AI Noise Reduction

Artificial Intelligence (AI) is being used increasingly in photography hardware and software. I wrote about it in some detail in my October 2018 blog piece on Computational Photography. Topaz DeNoise AI v2.0 is getting good reviews for finding random noise patterns in digital photographs and effectively removing them. In this case, I started with a virtual copy of the same photo used in Lightroom except with no sharpening or noise reduction applied. I invoked the Topaz DeNoise AI filter in Lightroom whereupon it created a TIFF file to be processed in the software. The DeNoise AI model using the automatic mode with no chroma noise reduction was applied to the photo before it was returned to Lightroom.
Results
Portions of the sky and ground were cropped tightly (beyond 100%) to yield a comparison between noise reduction techniques. Viewers may not see the differences discussed on their own monitors. My suggestion is to increase the magnification of your browser window (or the resolution setting on your monitor, if possible) to best view the detailed crops.
Sky Detail
Whether you are a human or a computer using artificial intelligence there is a fine line in discerning noise for astrophotography. That is, is a dark spot noise or a faint (low luminance) star? In my results, the best technique for retaining stars was the Median Stacking, followed closely by Topaz DeNoise AI. Lightroom removed the most stars leaving empty space. Obviously, someone who sees the photo for the first time would not notice that stars were removed.
The continuous tone between stars benefited the most from noise removal with Topaz DeNoise AI. It bordered on looking too smooth, i.e., the plastic look, however, that was upon inspection at 100%. This may look fine in a print. In Lightroom these areas appeared a little muddy. The Median Stacking appeared most natural looking.


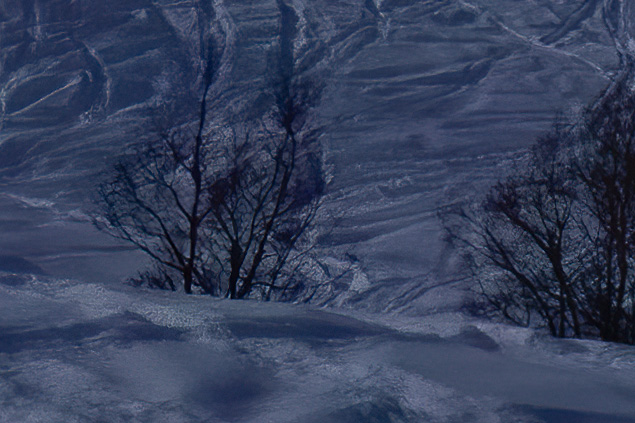
Shadow Detail
[Note – because the median stacking aligns ten files with star movement from first to last, the location of stars relative to the mountains will be different than with the files processed with Lightroom and Median Stacking.]
Shadows areas are where noise is most apparent because the signal to noise ratio is lowest where pixel values are low. For this photo the continuous tone of the snow covered mountain on the far left exhibited a lot of noise. This is readily seen in the photo with no noise reduction applied. Lightroom was the worst of the three at removing shadow noise. Topaz DeNoise AI virtually eliminated any noise seen in the snow, very similar to how it worked in the sky although not quite as extreme. Still, there were areas of the snow that appeared textureless. Noise in the Median Stacking technique was very much reduced and quite fine in granularity. As with the sky noise reduction, it looked the most pleasing of the three techniques and retained the fine texture of the snow.
What was most striking about the shadow areas was how well Topaz DeNoise AI and Median Stacking retained fine detail among the branches of the trees. I would give a slight edge to Topaz DeNoise AI with one caveat to be discussed in the section about artifacts. Lightroom fared the worst with a moderate loss of detail almost to the point of looking blurry. This could be problematic with larger prints.


Artifacts
Prior to using Topaz DeNoise AI for astrophotography, I’ve used it occasionally for photos taken during the day at high ISO. One problem I noticed early on is that it often has difficulty cleaning up areas adjacent to contrast edges. This can be seen in the night sky closest to the mountains. Little noise reduction is apparent and the software may have replaced it with its own random, noisy pattern.
While I was impressed with Topaz DeNoise AI’s retention of details for the tree branches, the background snow between the branches looked like it received little to no noise reduction. Although I do not know how the noise reduction algorithm works, this looks like a masking problem at a very detailed level. Indeed to create this crop I zoomed in 300%. Again, perhaps these problem areas would not amount to anything for most of the intended uses of a photo save a very large print display.

Recommendations
All three noise reduction techniques do a good job of removing noise from astrophotographs. Lightroom fared the worst in that it removed too many of the faint stars. Fine details lacked sharpness and appeared fuzzy. Nevertheless, it may be sufficient for all but the most demanding photos and end uses. And because it is a widely used RAW converter and easy to use, most users may never feel the need to look further.
Topaz DeNoise AI’s automatic noise reduction cleaned up noise in continuous sky and foreground areas too well, bordering on creating smooth, unrealistic looking surfaces. The unnatural look may be problematic for large prints, but for everything else—websites, social media, print publications—this should not be a problem. Of the three techniques, it greatly enhanced or retained fine details the best. Its biggest fault lies in masking at contrast edges where the uneven application of noise reduction becomes apparent. This would make it an unviable option for fine art photographic prints. Perhaps more experienced users of the software or manual control of the sliders would yield better results. At $79.99 for a perpetual license, it is reasonably priced and is easy to use as a plug-in to Lightroom and Photoshop or standalone.
My choice for noise reduction is Median Stacking in Photoshop. Fewer faint stars were removed compared to the other techniques and it kept fine details intact, almost as well as Topaz DeNoise AI. At all levels of inspection with Median Stacking it yielded the most natural looking photo where the application of noise reduction was not apparent. This contrasts with Topaz DeNoise AI where the “footprints” of post-processing were evident at contrast edges and within the finely detailed areas. Since Median Stacking resides within Photoshop there is no additional outlay beyond Adobe’s Creative Cloud $9.99/mo. Lightroom/Photoshop subscription package.
Despite my preference, there are two downsides to Median Stacking. First, the technique is time-consuming and requires a familiarity with Photoshop layers and masking; this is not an easy, automatic, one-button solution to noise reduction. Second, it requires several photos to work effectively. I used ten, but even more would presumably work better. Where the point of diminishing returns is I do not know. Even at ten images, each with an 8-second exposure time, I spent two minutes in the field taking what amounts to one usable photo. While this was fine for a relatively calm aurora night sky, had there been actively moving auroras, the fine detail would probably not be retained in the averaging process of median stacking.
Finally, regular readers of my blog have heard my personal exclamations of the wonders of photographic technology before. But the bottom line is this—combine any of today’s prosumer/flagship cameras with any of the three techniques for noise reduction and the result is clean, almost noise free high ISO astrophotos that would look like science fiction five or ten years ago. And it’s only going to get better!
As always, this is a most informative discussion about a very nuanced topic. Your explanation is noise-free, crisp and focused. Thanks for taking the time to create if and for your generosity in sharing
Bob Waldrop
Thanks, Bob.